
#Simple Stamping SU! Heartfelt Wishes

When it gets to be this part of December, I begin to look for simple projects to put together in a hurry! Do you find yourself in the same place? If so, then this simple layout that requires only the most basic of supplies just might be what you need.


The Heartfelt Wishes stamp set is available through January 3rd (or while supplies last). Featured in the July-December Mini catalog, it has beautifully scripted words that make any card elegant!

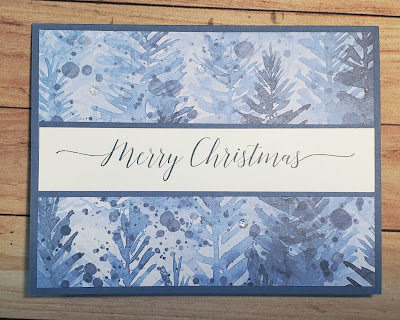
Just look at some of the possibilities:


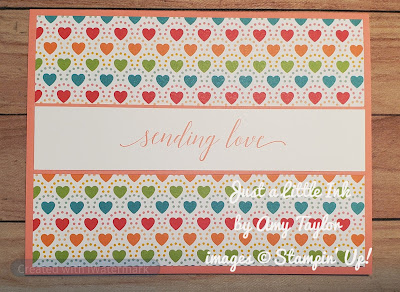
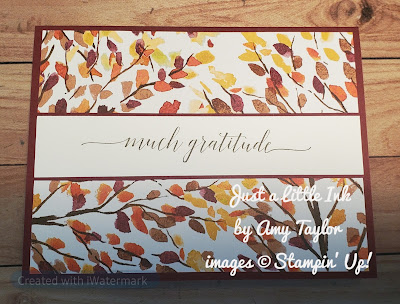
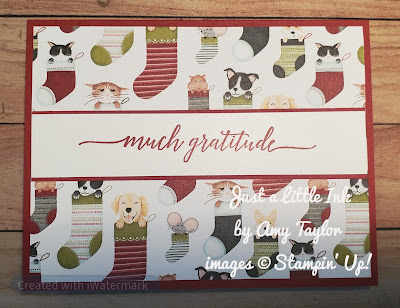
See how simply you can create different looks with the same layout by only changing the Designer Series Papers and colors of cardstock that you use?

I hope I've inspired you to go and create! And, if you don't have a demonstrator and have yet to purchase this great stamp set you can do so quickly through my online store by just clicking on the image of the products listed below. Thanks so much!

Here is a quick video showing you the step-by-step instructions:


Measurements:

Misty Moonlight Cardstock (card base): 8-1/2" x 5-1/2", scored along the 8-1/2" side at 4-1/4"; 1-1/8" x 5-1/4" (to layer the greeting onto the front)
Basic White Cardstock: 1" x 5-1/4" (for the greeting on front); 4" x 5-1/4" (inside)
Beauty of the Earth Designer Series Paper: 4" x 5-1/4"

Product List
Heartfelt Wishes Cling Stamp Set (English)
$21.00
Misty Moonlight 8-1/2" X 11" Cardstock
$8.75
Misty Moonlight Classic Stampin' Pad
$7.50
Basic White 8 1/2" X 11" Cardstock
$9.75
Beauty Of The Earth 12" X 12" (30.5 X 30.5 Cm) Designer Series Paper
$11.50
Wonderful Gems
$8.00
Stamparatus
$49.00
Small Grid Paper
$6.50
Take Your Pick
$10.00
Paper Trimmer
$25.00
Stampin' Seal
$8.00
Bone Folder
$7.00

Comments

Popular posts from this blog

2011 Desktop Calendar

This month in my stamp club meetings, I had the gals make these desktop calendars. It was a big hit. The image to the left of the calendar can be changed according to the season (winter, spring, summer & fall) by removing the image and placing one of the other 3 onto the velcro dot (attached behind the image). The corresponding side of the velcro dot is placed on the back side of the images. I used the stamp set A Flower for all Seasons , #111592, $14.95. And, the extra images are stored inside in a small cellophane bag. The calendar base takes only 1 sheet of card stock to make, measuring 9" x 6-1/2". With simple scoring and folding, it goes together very quickly. Another demonstrator had shared the calendar file that is printed onto printer paper and cut to size. All fit into the 1/2" library clip from the clips assortment (#112580; $6.95). There are 8 of them included in the package along with a couple of other style of paper clips. While they are still ...

Sunflower 3D Embossing Folder Techniques

  Do you ever need a quick, but 'wow' kind of card? When don't you, would be my response! That was the inspiration for this weeks card and video tutorial. The Sunflower 3D Embossing Folder is part of the next round of Online Exclusive products that will be available for purchase beginning July 1st. This huge embossing folder creates an intricate and detailed 'image' perfect for simple to elaborate projects. Since I'm more of a simple project kind of gal, that's the direction I went with. Here are the measurements: Crumb Cake (card base) cardstock: 8 1/2" x 5 1/2", 2 1/2" x 3/4" Mossy Meadow (layer) cardstock: 5" x 3 3/4" Crushed Curry (focal) cardstock: 4 3/4" x 4") Here is the video tutorial where I share this technique and one more as well as share some additional color combinations at the end: As always, thank you for subscribing, liking, sharing and commenting! For ease of ordering, simply click on the photos below...

Accordion Z-Fold Card Tutorial

  If you've been following me for awhile now, you know that I love the z-fold card. It's simple and yet a real "wow" for the recipient.  Today's card adds just a little twist, a few more folds. And, it's a great way to show-off the beautiful Designer Series Papers that Stampin' Up! sells too. I put together a video showing all the steps to put together this fun-fold card. And, at the end I share a few more projects that I made using it. I hope you'll check it out.  Measurements: Evening Evergreen cardstock: 5-1/2" x 11", score along the 11" side at 1-3/4", 3-1/2", 5-1/4" & 7"; 3" x 6", score along the 6" side at 3" Fitting Florets Designer Series Paper: 2 pieces cut at 1-1/2" x 5-1/4" and 2 pieces cut at 2-3/4" x 2-3/4" Basic White cardstock: 3-3/4" x 5-1/4" and one piece 3" x 3"  Be sure to use the November host code: PA43R2KF (good through 11/30/2022) ...